| Image: |
Info: |
Description: |

|
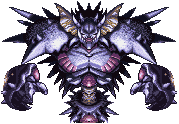
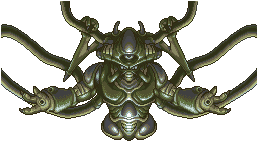
Yakra
600 AD Cathedral
HP: 920
TECH: 5
EXP: 50
G: 600
Attacks: Needle
|
The X-Strike and Flame Toss techs work well against this boss. Don't forget to heal with tonics or Frog's Slurp if your HP drops too low. This boss also tends to sneakily counterattack immediately after you land a strike. He can also deliver a nasty needle attack - both this and the counterattack will hit all your characters at once, so keep an eye on your HP levels and keep them topped up. |

|
Dragon Tank
1000 AD Guardia Castle
HP: 600 (Head), 266 (Body), 208 (Grinder)
TECH: 5
EXP: 40
G: 500
Attacks: Flame
|
This boss comprises three sections - the head, main body and the Grinder (wheel). The head can repair any damage done to the body, and contains a shield making it impervious to lightning and fire attacks. Due to this tactical advantage, target the head first before worrying about the body and wheel. Use your weapons to disable the head, then target the body and wheel with techs such as Flame Toss and Slash. Watch out for a variety of attacks from this adversary - the head will deliver a flame attack; the body will launch missiles or a laser beam at your team, and the entire unit can also charge at your team, running them over with the Grinder wheel. The laser beam and Grinder wheel are especially nasty, so keep an eye on your HP levels and heal when needed. |

|
Guardian
2300 AD Arris Dome
HP: 1200 (Guardian) 200 (Bits)
TECH: 5
EXP: 300
G: 1000
Attacks: Laser
|
Before tackling the main unit of this boss, target both support unit Bits and destroy them with your weapons. The main unit will eventually restore the Bits, so pummel it with your best techs for as long as possible. Don't forget to use the Aura Beam tech to heal when your HP falls, and take out the Bits once they reappear. Keep the process up until the main body is down. |

|
R Series
2300 AD Factory
HP: 150
TECH: 6
EXP: 480
G: 600
Attacks: Laser
|
Six of Robo's brethren challenge you in this battle. The robots' regular attacks are manageable, but watch out for a few nasty moves. They tend to hurl each other at your team, and when only one robot remains, it can use a bomb to damage your entire team. Use techs that deal damage to multiple enemies to help maximise your damage rate. Make sure your team is at a decent level as you'll only have two members to fight with. Marle is always handy for healing your team, but Lucca's Flame Toss tech used in tandem with Crono's Cyclone can give you a solid offensive tactic. If you choose Lucca, make sure your tonics are stocked up. |

|
Heckran
1000 AD Heckran Cave
HP: 2100
TECH: 10
EXP: 250
G: 1500
Attacks: Lightning
|
Weapons won't work against this boss, so magic techs are your only hope. If you have a Magic Scarf in your inventory, make sure one of your team is wearing it. The Heckran likes to commentate and taunt you, but this can provide hints on when to attack and when to hold back. If he says "Go ahead and try to attack", don't take the bait, otherwise he'll immediately counterattack and deliver major damage to your entire team. Wait for him to say "Brief counterattack" before tearing into him with Lightning, Fire and Ice techs. If he says "Yes Indeed!", one of your characters will be on the receiving end of a major attack. Be ready to heal them immediately afterwards. |

|
Zombor
600 AD Zenan Bridge
HP: 960 (top) 800 (bottom)
TECH: 10
EXP: 350
G: 1500
Attacks: Physical attacks
|
This skeletal menace comprises two sections. The creature's regular attacks are manageable, but be ready to heal everyone with Marle if it uses an earthquake-style attack. Target the upper body with Ice techs and weapon attacks. Once the upper body disintegrates, the legs will use MP Buster on whoever delivered the final blow, draining them of all their MP. Give the legs Lightning and Fire techs along with regular weapon attacks to finish it off. |

|
Masa & Mune
600 AD Denadoro Mts.
HP: 1000 (single) 3600 (together)
TECH: 4 (single) 10 (together)
EXP: 400 (single) 500 (together)
G: 400 (single) 1500 (together)
Attacks: Wind
|
Initially, Masa and Mune appear as young children before they reveal their true forms and attack your team. Together they can deliver some potent attacks, so using Lucca's Hypno Wave to keep one of them asleep is helpful. Concentrate your attacks on a single target (use regular weapon attacks), as you only need to defeat one of them to end the battle. Once beaten, this message appears "Apart, Masa and Mune are powerless", followed by "With Masa's bravery, and Mune's knowledge! Two become one!" That should be enough of a hint to reveal that the battle is far from over. Masa and Mune merge together to become a single large muscly brute. The brute's attacks are all strong, so have Marle and Robo (with the Aura Beam double tech) ready to heal your team at a moment's notice. When a message indicates that the boss is storing tornado energy, quickly neutralize it with Crono's Slash tech, otherwise a major attack is incoming. The creature might also use its own Slash technique, harming two of your team members. Defeat this boss to subdue Masa and Mune and receive the damaged Masamune sword. |

|
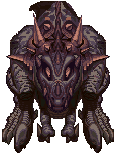
Nizbel
65,000,000 BC Reptite's Lair
HP: 4200
TECH: 10
EXP: 500
Attacks: Physical attacks
|
Like regular reptites, Nizbel is weak against Lightning attacks. Pound him with as many Lightning techs as you can, supplemented with regular attacks. Just be ready to heal your whole team quickly, as when the message "Releases electrocution energy" appears on-screen, Nizbel will fire electricity at everyone, delivering hefty damage. Bring your team back up to full health if possible, then resume your Lightning attacks until he releases electricity again. He can also deliver a substantial earthquake attack. Use Ayla's Charm on Nizbel to receive a Third Eye. |

|
Slash
600 AD Magus' Castle
HP: 3200 (first) 5200 (second)
TECH: 10
EXP: 500
G: 1500
Attacks: Sword attacks
|
Slash will tackle you in two stages. The first form is fairly easy to deal with - simply use techs and weapon attacks at will. Watch out for his frantic "Attack attack attack" technique which will leave one of your party members fairly injured; quickly heal them before attacking again. The first stage of the battle is won when Slash delivers an attack against your entire team. He'll then snatch a sword from the wall and begin the second stage. The sword grants him the Slash technique, which can hit anywhere from one or all of your characters. An attack narrated with "Yes indeed" is quite nasty, so keep on your toes and heal your team often throughout this battle. Defeating Slash will reward you with the Slasher 1 sword. |

|
Flea
600 AD Magus' Castle
HP: 4120
TECH: 10
EXP: 500
G: 1000
Attacks: Chaos, sleep, poison
|
Flea will tackle you in two forms. The first form is quite unassuming, but he will drain all the MP from one of your characters upon defeat. His second form is weak against weapons, so use Lucca to defeat him now as you'll need your healing characters (Marle, Frog or Robo) stocked up on MP for the second part. Once the second part begins, Flea's attacks will greatly increase in severity. He'll use a combination of Chaos, Sleep and Poison attacks against your team. Bring plenty of items in your inventory to counter these status-affecting attacks. His Stare move will confuse one of your team members into attacking the others. This will drain a significant amount of health from your team, so quickly heal up before focusing on Flea again. The X-Strike and Spincut techs work well against Flea, along with regular weapon attacks (if Lucca lost all her MP, her gun can still contribute). Use Charm on Flea to receive a Flea Vest, and defeat Flea to earn yourself a Magic Tab. |

|
Ozzie
600 AD Magus' Castle
HP: 1000
|
This is one of the quirkier battles in the game. Ozzie deploys a solid protective barrier around himself, and will counterattack anything you throw at him. See the four winches around the room? Attack them all to open a trapdoor conveniently placed right under Ozzie. The unsuspecting goon falls out of sight and the battle ends. Use Ayla's Charm during the battle to receive an Ozzie Pants. |

|
Magus
600 AD Magus' Castle
HP: 6666
TECH: 15
EXP: 1500
G: 3000
Attacks: Dark Magic
|
Magus is a crafty adversary, and this battle can be one of the hardest boss fights in the game. Throughout the battle, pay close attention to the elemental type of magic that Magus is using against you. Whatever the element is, he has a corresponding defensive magical barrier. Use techs of the same elemental type against him (eg. if the barrier is Lightning-based, use Lightning attacks). The barrier will change every time you attack him; use regular attacks if you don't have a party member with the right elemental tech. Use a varied party to help increase the odds of having the right elemental attack - Crono, Frog and Lucca are a good bet, and try to have learnt the Delta Storm triple tech if you can. Frog's Masamune will help give your team an edge - use it against Magus when he's using a non-water elemental barrier to reduce his magic defense and stop him from using certain spell attacks on your team. Later in the battle Magus will attempt to cast a lengthy spell - pound him with everything you've got (surprisingly he won't counterattack). If Magus manages to complete the spell he'll unleash his strongest attack: Dark Matter. Quickly heal your wounded before continuing. Use Delta Storm if available and all of your best techs to finish him off. |

|
Nizbel II
65,000,000 BC Tyrano Lair
HP: 6500
TECH: 15
EXP: 880
Attacks: Physical attacks
|
Nizbel II lives up to the name of his predecessor in every way. Watch out for a nasty charge attack that affects your entire team - try to compensate with a tech that heals the entire team to save time (like Robo's Heal Beam). As with the original Nizbel, use Lightning techs to lower his defense and make him more vulnerable to regular weapon attacks (and helpful techs like Rock Throw). Eventually he'll discharge the build-up of lightning energy, harming your whole team. Heal immediately before attacking again with Lightning. Don't forget to use Ayla's Charm to snag a Third Eye item before you defeat Nizbel. |

|
Black Tyrano and Azala
65,000,000 BC Tyrano Lair
HP: 2700 (Azala) 10500 (Black Tyrano)
TECH: 25
EXP: 1800
Attacks: Physical attacks
|
This is the final showdown between the humans and reptites. Due to the immense size of the Black Tyrano, target Azala first. Azala's own attacks are manageable, but the Black Tyrano enjoys delivering fire attacks and will often chew one of your team members up for significant damage. Quickly heal whoever is snacked on. Use regular attacks together with Lightning and Fire techs against Azala. Once Azala's defeated, she'll use her Azala Break attack as a parting gift to your whole team. Use a tech like Robo's Heal Beam to quickly reverse the damage. Before targeting the Black Tyrano, wait for the message "Removes def, and is storing pwr" to appear. A countdown now appears - quickly throw all your best techs at the tyrano. Ayla's Cat Attack tech and Crono's Spincut are effective. Have your team ready to heal when the countdown reaches zero - the Black Tyrano will unleash a major attack to harm all your team members. If you wish - before defeating them - use Ayla's Charm tech on both Azala and the Black Tyrano to receive a Power and Magic tab. |

|
Golem
12,000 BC Zeal Palace
HP: 7000
TECH: 35
EXP: 1000
G: 2000
Attacks: Physical attacks
|
This can be a very difficult boss battle due to the Golem's rapid counterattacks. Its Iron Orb attack is also bad news, as it'll halve one of your team member's HP. Thankfully the Golem only counterattacks physical weapon attacks, so use elemental techs against it. Vary your elemental attacks to keep it busy, and if you must resort to physical attacks, use a tech like Rock Throw to inflict major damage. But quickly return to using elemental techs afterwards (try using a Fire tech, as the counterattack against that will be reduced). Keep your team's HP topped up at all times, especially after the Iron Orb attack. Use Charm on the Golem to receive a Magic tab. |

|
Sir Krawlie
2300 AD Sewer
HP: 500
TECH: 5
EXP: 100
G: 500
Attacks: Physical attacks
|
Sir Krawlie's not much of threat to a high-level team. But you can access the Sewer early in the game, at which point he'll be quite difficult to conquer. If you struggle with him early on, return later in the game and throw your best techs at him. Just watch out for his 1 HP attack; immediately heal whoever it hits. |

|
Blue Beast, Red Beast, and Mud Imp
12,000 BC Beast's Nest
HP: 1200 (Mud Imp) 5000 (Blue Beast, Red Beast)
TECH: 16 (Blue Beast and Red Beast), 10 (Mud Imp)
EXP: 600 (Blue Beast and Red Beast), 354 (Mud Imp)
G: 1600 (Blue Beast and Red Beast), 1600 (Mud Imp)
Attacks: Mud attacks
|
This trio of foes have lots of HP but shouldn't be difficult to beat. The colour of the two beasts betrays their weaknesses - use Ice elemental techs against the Red Beast, and Fire elemental techs against the Blue Beast. Leave the Mud Imp until last and use physical attacks and techs against it. If you can't defeat the lone Imp in time it'll escape from the battle. Use Charm on the trio to receive a Speed tab, Mermaid Cap and an Elixir. |
|
Giga Gaia
12,000 BC Mt Woe
HP: 9500 (Body) 2000 (Arms)
TECH: 30
EXP: 3000
G: 3000
Attacks: Fire, Shadow, Ice attacks
|
Giga Gaia's main attacks come from its two arms, so don't try to attack the main body until both arms are down. With its arms, Giga Gaia will dual-attack your team using Shadow and Fire elemental attacks. If you have special coloured armour in your inventory (like a Black Mail, a Red Mail or a Red Vest), make sure your team is using them. That way no matter which type of elemental attack Giga Gaia uses, one of your team members will be healed instead of harmed. Use your best techs against this boss (especially high-level area-affect techs like Delta Force, Luminaire, Flare and Shock). Defeat the arms and quickly tear into the main body before it restores both arms. Use Charm on the main body to receive a Speed tab. |

|
Dalton
12,000 BC Zeal Palace
HP: 3500
TECH: 30
EXP: 1000
G: 2500
Attacks: Physical attacks
|
Like the Golem boss, Dalton enjoys using the Iron Orb attack, halving the HP of one of your team members. Quickly heal them before returning fire. Use your best techs to finish him off fairly easily. Dalton will use an odd gastrointestinal attack upon defeat, harming your entire team with his gasses. Make sure your HP levels are kept high to avoid a last-minute KO. Use Charm on Dalton to receive a Power Meal. |

|
Golem Twins
12,000 BC Ocean Palace
HP: 10000 (Each)
TECH: 70
EXP: 2000
G: 4000
Attacks: Physical attacks
|
This pair of Golems will use similar attacks to the original one, but at a much higher rate thanks to their added number. If you have Crono's and Lucca's best techs (Luminaire and Flare), use them to attack both Golems at the same time. Try using any other dual-strike techs as well. Keep your HP up, especially after an Iron Orb attack. Use Charm on both Golems to pick up two Magic tabs. |
|
Lavos
12,000 BC Ocean Palace
HP: 30000
Attacks: Destruction rains from the heavens, Obstacle, Lavos Needle.
|
Yikes, what's this? The final boss only halfway through the game? Normally you're not supposed to conquer Lavos at this point and must lose to continue the regular story. However, playing through the game again on New Game + with a high-level team can yield a different result (and a secret game ending). This form of Lavos is much harder to beat than the regular Lavos Shell battle at the end of the game, so you'll need to keep your team's HP up high at all times. Lavos' attacks are also more powerful and frequent (especially its signature "Destruction rains from the heavens!"). Make sure your team is equipped with items that protect against any status ailments. Use your best techs (Luminaire, Flare, Shock, etc.). Once the shell is finished, your team will enter and you'll fight the core Lavos bosses as per the end of the game (check the very end of this page for guides).
Note: In New Game +, you can fight Lavos right at the beginning of the game. Look for a sparkle of light on Lucca and Taban's right teleport pod at Leene Square. Touch it and you'll be taken to this form of Lavos. |

|
Golem Boss
12,000 BC Blackbird
HP: 15000
TECH: 40
EXP: 2500
G: 2000
Attacks: Physical attacks
|
This curious boss won't attack your team, leaving itself completely vulnerable. The poor thing is afraid of heights, so eventually it'll escape from battle if you can't defeat it quickly. |
|
|
Dalton Plus
12,000 BC Epoch
HP: 2800
TECH: 40
EXP: 2500
G: 2000
Attacks: Physical attacks
|
Time to settle the score with this would-be-king. The entire battle takes place on the now flight-enabled Epoch (thanks Dalton). He'll continue to use the Golem's signature Iron Orb attack to halve the HP of one member of your team; remember to heal immediately afterwards. Use your best techs to conquer him fairly easily. Use Charm on him before the battle ends to receive a Power Meal. |

|
Lavos Spawn
2300 AD Death Peak
HP: 4000 (Head) 10000 (Body)
TECH: 120
EXP: 747
G: 500
Attacks: Lavos needle
|
This Lavos infant has two segments, a head and a body. Only attack the head as the body is impervious to damage. Use single-target physical attacks and elemental techs against just the head, otherwise the body will counterattack with a needle attack. Frog's Leap Slash tech, Robo's Uzzi Punch and Ayla's Triple Kick work well against the head. You'll face three of these creatures on the way to Death Peak's summit; each will yield an Elixir upon defeat. |

|
Son of Sun
2300 AD Sun Palace
HP: 12000 (Core) 30000 (flames)
TECH: 40
EXP: 3800
G: 2000
Attacks: Fire magic
|
With the right equipment and tactics, this boss is surprisingly easy to beat. Make sure your team is equipped with Red Mail, Red Vest or Ruby Armor to protect against the myriad of Fire elemental attacks it'll throw at you. Don't bother attacking the center eye - only one of the flames is the weak point. Attacking the wrong flame will result in an immediate counterattack, so you'll need to quickly identify the correct flame. If Magus is on your team, use his Black Hole tech to knock out two of the five flames. Use an area-affect tech to strike all the flames, and take note of the one that doesn't counterattack you back. Target that flame and use single regular attacks. Every strike against the correct flame results in 215 damage applied to the eye no matter how strong your attacks are against the flame, so feel free to use regular weapon attacks. When the boss spins all the flames around itself, use an area-affect tech again to find the weak flame. Use Charm on this boss to receive a Black Mail. |
|
|
Flea Plus
600 AD Ozzie's Fort
HP: 2500
TECH: 20
EXP: 2000
G: 2000
Attacks: Chaos, sleep, poison
|
Oddly, Flea uses the same attacks as last time, and has less HP. Equipment that protects against status ailments will help, and use your best techs to finish him off easily. |
|
|
Super Slash
600 AD Ozzie's Fort
HP: 2500
TECH: 20
EXP: 2000
G: 2000
Attacks: Sword attacks
|
Slash will also use the same attacks as last time (with his sword), and like Flea has less HP. Finish him with your best techs. |
|
Great Ozzie, Super Slash and Flea Plus
600 AD Ozzie's Fort
HP: 4000 (Slash and Flea) 6000 (Ozzie)
TECH: 50, 80
EXP: 5000, 7500
G: 3000, 4000
Attacks: Sword and Magic attacks
|
As a trio these guys are much harder and put up quite a fight. Any attack made against them will result in a counterattack (up to three if you strike them all at once) so it's best to focus on a single target at a time and only suffer one counterattack. Be ready to heal your team if they use their own triple tech. Feel free to target Slash and Flea individually, but if you defeat Ozzie they'll all go down at once. So focus your attacks against Ozzie with strong single-target techs like Triple Kick, Uzzi Punch, Confuse, Mega Bomb, etc. Use charm on the trio to receive an Ozzie Pants, Slasher 2 and Flea Vest. |
|
|
Great Ozzie
600 AD Ozzie's Fort
|
This battle is Ozzie's last hurrah. As always he's not much on his own, so attack the nearby lever. This time your team will fall down a hole, so simply climb back up and face him again. Oddly, help will then come from an unlikely source to defeat Ozzie (sit back and enjoy the show). Use Charm on him to receive another set of Ozzie Pants. |
|
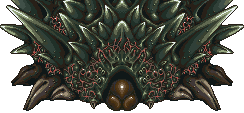
Rust Tyrano
600 AD Giant's Claw
HP: 25000
TECH: 40
EXP: 3800
G: 2000
Attacks: Physical, fire attacks
|
This version of the Tyrano is much like Azala's Black Tyrano, but much stronger. Be sure to equip Red Mail, Red Vest and Ruby Armor for your team to guard against its immense Fire elemental attacks. Eventually it'll count down from five and unleash a single massive Fire attack - get ready to counter the damage and heal your team. This boss has plenty of HP, so use your best techs like Luminaire, Flare and Triple Kick to whittle it down. Bring Ayla and use Charm on the Tyrano to receive a Red Mail. Defeat this boss to pave the way to the Rainbow Shell. |

|
Yakra XIII
1000 AD Guardia Castle
HP: 18000
TECH: 40
EXP: 3500
G: 2000
Attacks: Needle attacks
|
Yakra XIII has a lot in common with his predecessor, but is much stronger. He enjoys using Chaos against your team, so equip any armour that protects against Confuse. Otherwise make sure you have plenty of items to remove status ailments. Yakra has plenty of needle attacks, with Needle 13 a particularly nasty one. He also often triggers an earthquake. Marle, Lucca and Ayla are a good combination for this boss - use the Antipode 3 and Triple Kick techs. Don't forget to Charm him to receive a White Mail. Keep your HP levels up - as when you deliver the final blow, Yakra will sneak in one last needle attack. You'll be rewarded with a Mega Elixir upon defeating Yakra. |

|
Retinite
600 AD Sunken Desert
HP: 1000 (Core) 5000 (top) 4800 (bottom)
TECH: 100
EXP: 2600
G: 2000
Attacks: Dark magic
|
The Retinite looks like ol' Zombor, but is a much harder boss. Before tackling this boss, make sure you have a team member that can cast Ice or Water elemental techs. You'll quickly discover that all of your attacks against any part of the Retinite will cause it to raise its defense. Thankfully this is where Water and Ice techs can soften its defense and leave it vulnerable. Target the eye first and blast it with a Water or Ice tech (Marle's Ice 2 works quite nicely). Quickly pummel the core with physical attacks - elemental techs won't work. Ayla's Triple Kick and Crono's Confuse should work well. Keep your team's health up with Aura Beam, and use Ayla's Charm on the eye to receive a Speed tab. |

|
Atropos XR
2300 AD Geno Dome
HP: 6000
Attacks: Laser attacks
|
This is a solo battle for Robo against Atropos XR, and one that he's utterly reluctant to take part in. You'll need to have him at a high level to rise to the challenge. Atropos uses a lot of Robo's own attacks, like Area Bomb and Rocket Punch. She'll also heal herself often with Heal Beam. Use your own Area Bomb tech for good measure, and try to have all of Robo's techs available at this point in the game for the best advantage. Oddly, she'll keep attacking for a short time after you defeat her. Once conquered, Atropos will leave behind her ribbon that Robo can use. Equip it to raise Robo's Speed by three and Magic Defense by ten. |

|
Mother Brain and Display
2300 AD Geno Dome
HP: 5000 (Mother Brain) 1 (display)
TECH: 40
EXP: 3000
G: 3000
Attacks: Laser attacks
|
This is the artificial intelligence mastermind controlling the Geno Dome factory. Defeating her will permanently close the factory down. The three displays surrounding Mother Brain act as support units by healing her throughout the battle. It's tempting to destroy them, but doing so will cause Mother Brain to unleash her strongest attacks against your team. So it's best to knock out two at most and leave one remaining. It'll continue to heal her but you won't fall victim to Mother Brain's heavier attacks. Target Mother Brain with single-attack techs like Crono's Confuse, Ayla's Triple Kick and Robo's Uzzi Punch, otherwise area-affect techs will blow away the displays. Use Charm on Mother Brain and her displays to receive a Blue Mail and Elixirs. Defeat Mother Brain to close the factory and receive a Terra Arm and Crisis Arm. Just bear in mind that after this battle, you can no longer enter the factory. If you want to make use of the numerous enemies inside and their generous experience points for level-raising, don't defeat Mother Brain until after you've finished. |

|
Mega Mutant
Black Omen
HP: 4600 (top) 3850 (bottom)
TECH: 50
EXP: 900
G: 1500
Attacks: Dark magic
|
This is one strange-looking boss, eh? This boss likes to use Chaos against your team, so either come equipped with Confuse-resisting armour or use items to remove status ailments. Pummel the creature with your best techs and it shouldn't cause much of a bother. Use Charm on both parts of the boss to receive an Elixir and a Vigil Hat. Strangely, both parts are symbiotically linked, so you only need to defeat one section to conquer the entire creature. |

|
Giga Mutant
Black Omen
HP: 5800 (top) 4950 (bottom)
TECH: 80
EXP: 1500
G: 2000
Attacks: Dark magic
|
This mutant is slightly stronger than the Mega Mutant and packs a few nasty attacks. Regular physical attacks won't cause much damage, so you'll need to use elemental techs for best effect. Except every time you attack, it'll counterattack by taking some of your HP to heal itself. It can also use a life shaver attack, reducing one of your team's HP right down to 1. Quickly heal the affected member before returning fire. Use Charm on both parts to receive a Hit Ring and a Wall Ring. |

|
Terra Mutant
Black Omen
HP: 7800 (top) 20000 (bottom)
TECH: 100
EXP: 2000
G: 3800
Attacks: Dark magic
|
This mutant's main party trick is the lower part's immunity to elemental techs. Any elemental attack made against it will heal the lower half. The lower half also has much more HP than the top, so concentrate all your attacks on the top part. Like before, defeating just the top part will finish the entire creature. Use Charm on both sections to receive a Muscle Ring and a Power Seal. |
|
|
Lavos Spawn
Black Omen
HP: 10000 (Head) 13500 (Body)
TECH: 120
EXP: 2450
G: 2500
Attacks: Lavos needle
|
This is the toughest Lavos Spawn you'll face in the game. Only attack the head, as any damage made to the body will trigger a severe counterattack. It uses Dark Bomb and a nasty needle attack that inflicts Confusion, so be ready to use items that remove status ailments. Use single-target techs like Confuse, Uzzi Punch and Triple Kick against the head alone. Use Charm on the head and body to receive a Safe Helm and a Haste Helm. |

|
Queen Zeal
Black Omen
HP: 12000
Attacks: Halation
|
This is the first of two boss battles against the Queen. The Queen immediately opens the battle by draining all of your team's HP right down to 1 - but thankfully (and oddly) she can't do any more damage. Attack her with everything you've got, but use low MP-cost techs. If you have Frog or Ayla, use Frog Squash or Dino Tail as these techs work best when your characters are at 1 HP. Don't bother trying to heal your team as the Queen will just sap your health back down to 1 HP again. She'll also occasionally drain some of your team's MP. Charm the Queen to receive a Mega Elixir (if you have Ayla on your team), and defeat her to receive another one. |

|
Mammon Machine
Black Omen
HP: 18000
Attacks: Dark magic
|
If your team is still at 1 HP from the battle against the Queen, use the Mega Elixir you received from her. Once your team's back at full strength, pound the Mammon Machine with your best techs. Keep in mind that Frog's Masamune sword has a special advantage in that it absorbs energy from the machine. If you attack the Mammon Machine with elemental techs, its attack power rises, and if you pound it with physical attacks, its defense rises. So to avoid a drawn-out battle, use your best elemental techs. When a message appears saying the Mammon Machine is standing still, you're almost there. Charm the machine to receive another Mega Elixir. |

|
Queen Zeal
Black Omen
HP: 20000 (Head) 28000 (Right hand) 28000 (Left hand)
Attacks: Lightning, physical attacks
|
This is the final battle against Queen Zeal. This boss comprises a head and two separate hands. Leave the hands alone and only target the head. Use single-target techs against the head, otherwise the hands will deliver nasty counterattacks. The counterattacks will either drain the attacker's HP to 1 or MP to 0, so you really want to avoid the hands. Equip armour that provides effective protection against magic attacks, as Zeal will cast a number of magic attacks throughout the battle. Single-target techs like Confuse, Mega Bomb, Uzzi Punch and Triple Kick work well against the head. Her Lightning attack won't give you much grief, but watch out for the Water one. She can also occasionally drain your team's HP down to 1, so immediately heal before any further damage is dealt. Bring Ayla along and use Charm on the head to receive a Mega Elixir, and on the hands to score a Prism Dress and a Prism Helm. Defeat Queen Zeal and the Black Omen will disappear forever. |
|
|
Lavos
1999 AD
HP: 10000 (final form)
Attacks: Destruction rains from the heavens, Obstacle, Lavos Needle.
|
At last, the final showdown with Lavos begins. Have your team equipped with Gold Studs (which lowers MP cost by 75%) and the best armour and weapons you have (armour that protects against status ailments is always a good idea). This form of Lavos will use the attacks and attributes of nine other bosses you fought earlier in the game, in this order:
- Dragon Tank
- Guardian and Bits
- Heckran
- Zombor
- Masa and Mune (their second form)
- Nizbel
- Magus
- Black Tyrano and Azala
- Giga Gaia
- Lavos Shell
At this point in the game you should be more than a match for the earlier boss forms, so they shouldn't cause much trouble. Once Lavos reverts to its final shell form, use your best techs. Keep your team healthy, as Lavos' own attacks pack quite a punch. With a high-level team, (try to aim for at least level 70) you should be able to conquer this boss without too much trouble. Defeat the shell to gain access to the Lavos Core. |
|
Lavos Core 1
1999 AD
HP: 20000 (body) 12000 (left arm) 8000 (right arm)
Attacks: Shadow Doom Blaze, Shadow Slay, Obstacle, Flame Battle
|
This is the inner core of Lavos, buried deep within the outer shell. Needless to say, it wouldn't get many visitors down there. Make sure your team has at least one member to act as medic - either Robo, Marle or Frog. Ensure that everyone has a Gold Stud equipped, and try to use armour that protects against status ailments. The core of Lavos has a body and two separate arms; your ultimate target is the body. But you'll need to tackle and destroy the arms first. Watch out for Lavos' opening attack - immediately heal afterwards. If you have Marle on your team, use Haste on each of your characters to speed up your attacks. Attack the entire boss with your best techs like Luminaire and Flare to harm all three targets at once. Keep this up and Lavos' right arm will go first. Watch out now as the left arm can dispel one of your character's status ailment protection and any magical boost effects, leaving them vulnerable to status changes. Look after this character if their status is affected, and remember to caste Haste on them again. Defeat the left arm and wait for the body to attack your team. The attack will likely inflict Confusion on any vulnerable character, so quickly restore any affected members back to normal. Once Lavos' attack has passed, the main body's defense will drop significantly. Open up with your best techs and pummel the body as quickly as possible. All of Lavos' attacks are quite potent, so use your acting medic diligently to heal your team during the battle. Try to inflict as much damage as possible before Lavos revives the arms. If the arms return, simply wipe them out again before concentrating on the body. Defeat the main body to arrive at the final battle of the game. |

|
Lavos Core 2
1999 AD
HP: 2000 (left bit) 10000 (central body) 30000 (right bit)
Attacks: Granite Rock, Crying Heavens
|
Welcome to the final battle against Lavos! This final Lavos form has three components like its predecessor. The right bit is actually the main core of Lavos, while the central body and left bit act as support units. The bits will often heal the central body, and can also attack your team individually. The central body also often casts Time Warp, changing the background of the arena to different time periods. This seems to affect the type of attacks it uses. Lavos can also dispel one of your character's status immunity protection, so look after the affected member from now on. If you have Marle on your team, remember to caste Haste on everyone. Blast the trio with your best techs (Luminaire, Flare, etc.) and don't worry that elemental attacks heal the left bit. Eventually the central body will go down, leaving the two bits behind. Once it's gone, hold your attack and heal up your team if needed. Without the central body, the right bit will eventually shut down its defense, allowing you to really pour on the damage. But if you attack the left bit, they'll both immediately counterattack. You can destroy the left bit with physical attacks, but with limited time until the right bit's defense returns to normal, its best to concentrate only on the right bit. Use single-target techs like Crono's Confuse on the right bit. Lucca's and Robo's DoublevBomb double tech works amazingly well on high levels - but make sure you place Lucca in the middle of your team and Robo last so that he'll be positioned next to the right bit, amplifying the damage further. Keep your team healthy and use Mega Elixirs if you run out of MP. Eventually the right bit will revive the left bit (if you destroyed it) and the central body. It'll also soon restore its defense level, so you'll need to destroy the central body and wait for it to lower its defense before pummeling it further. Destroy the right bit to finally put an end to Lavos and complete the game! |