|
Image
|
Name
|
Description
|

|
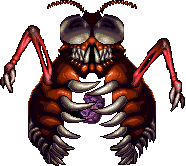
Thraxx
Bugmuck Swamp
HP: 600
EXP: 500
MONEY: 750 Talons
|
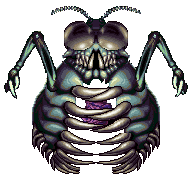
You will encounter Thraxx inside of the huge bug-shaped cave in the Bugmuck swamp. He will be at the end of a large room. He will often be lunging down at you with his claws, so try to avoid them by staying out of reach. He'll also occasionally use some alchemy such as Acid Rain, so be ready to heal. You'll notice a large purple heart enclosed within his ribs. This is the weak point. To hit it, walk up to the ribs and strike them with the Bone Crusher. The ribs will open and you can then go up and hit the heart with the bone or Hard Ball. When you hit him he'll throw you back so you will have to walk up and hit the ribs again. Heal each time he throws you back and concentrate on the heart while ignoring the claws. |

|
Salabog
Blimp's Bog
HP: 2000
EXP: 700
MONEY: 66 Talons
|
Salabog will be difficult to beat, as he has a lot of HP. He will be below the surface of the swamp to begin with and will surface often in three different locations. Each time he appears he'll fire out blue flames which will become small fireballs that fly around the screen. Try to destroy them if they get too close. To defeat him, strike him as he appears out of the swamp. When you notice his eyebrows moving, move out of his way as he'll then lunge down at you. One good way to hit him is to use the Horn Spear and charge it up to level 2 or 3 and then throw it at him from a distance. Try not to get hit too much and make sure you avoid the small fireballs. |

|
Magmar
Volcano Core
HP: 1000
EXP: 500
MONEY: 900 Talons
|
Magmar will have the ability to heal himself during this battle, so you will need to be hitting him constantly. Make sure your weapons are at level two or three so you can deal him more damage than regular attacks. He will be able to cause you damage from anywhere, by slamming down on the ground and causing it to shake. He will also often jump into the lava which will heal him. Just remember to keep hitting him with charged-up shots. Heal often as he uses some fairly strong attacks. |

|
Vigor
Nobilia Colleseum
HP: 1050
EXP: 1050
MONEY: 1000 Jewels
|
You will battle Vigor in a large arena surrounded by a huge crowd. Your chances for survival against this guy seem to be pretty slim, as when you manage to hit him from the front you'll only cause him about 2 or 3 HP damage. His weak point is his back. Make sure that before the battle you have the spear at level 3. He will often be charging at you and will often throw a boomerang-type weapon at you, so be ready to dodge it. Don't worry about the projectiles the crowd throws at you as it will only cause minimal damage. As Vigor moves in a straight line across the screen, use a charged-up shot on him from behind to cause more than 150 HP damage. Keep doing this to defeat him and heal often. |

|
Megatour
Hall of Collosia
HP: 2600
EXP: 2500
MONEY: 3000 Jewels
|
Megatour will not be easy to beat, as he'll be charging around the room often. He'll jump around often, so be ready to be moving around a lot. Be careful of his formula attacks, and heal when needed. Beat him by using the Bronze Spear and strong formulas such as Crush. After you beat him you'll receive the first Diamond Eye. |

|
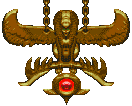
Rimsala
Pyramid
HP: 1200
EXP: 1200
MONEY: 1000 Jewels
|
Rimsala will be in the form of a large golden statue which will lower down from the roof. The lower part with the red gem will release and battle you. It will fly around the room while spinning around. Be very careful of the statues around the room, as they will be constantly be using formulas on you which cause heavy damage. You can slow down the statues by using a dark formula on them. Concentrate on Rimsala and be ready to heal often during this battle. When you defeat him you'll receive the second Diamond Eye. |

|
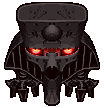
Aegis
Nobilia Town Square
HP: 3800
EXP: 3000
MONEY: 1200 Jewels
|
Aegis will appear in the place of the dog statue once Horace's evil twin inserts the two Diamond Eyes in the statue. He will be difficult to defeat. He has a lot of HP and will be using dark formulas on you often during the battle. He will also occasionally create smaller enemies who will attack you during this battle. You will only be able to damage him when the objects on his head are flashing or are not there. Use your Bronze Spear and throw it at him when he is open for attack. Use strong dark formulas as well to weaken him. Be ready to heal often as his attacks are fairly strong. |

|
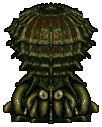
Aquagoth
Oglin Cave/Aquamaze
HP: 2500
EXP: 5000
|
Aquagoth will meet you at the end of the large underground maze. He will be able to attack you from many areas by using his tentacles. You can destroy them but it will be hard to hit them. He will also often use dark formulas on you, so be ready to heal if your HP gets too low. Defeat him by using charged-up attacks on his face and also use strong dark formulas. Once you defeat him a man above will help you escape from the underground maze. |

|
FootKnight
Gothica Chessboard
HP: 2400
EXP: 850
MONEY: 200 Gold Coins
|
FootKnight won't be too difficult to beat, he just moves around too fast though. If you want, you can just let the dog finish him off as he will be able to hit him, but you can also help by using charged shots. Be careful of his movement, as he will often charge at you without warning and is sometimes hard to avoid. Heal whever you have to, but you won't need to much during this battle. Once you defeat him a stairway will appear leading down into the chessboard. |

|
Bad Boy
Mystic Woods
HP: 700 (each)
EXP: 400 (each)
MONEY: 333 Gold Coins (each)
|
The shape shifters you find on the bridge halfway through the forest will attack and shape-shift into a copy of you! Each of them has a lot of HP and will be moving around a lot during the battle so they will be difficult to beat. You will have to fight three copies before they are destroyed. Be careful of their charged-up attacks and their dark formulas such as Storm and Nitro. Heal often and make sure that the dog doesn't lose all his HP as he will be important during this battle. Attack them with charged-up shots and strong dark formulas. |

|
Timberdrake
Mystic Woods
HP: 2000
EXP: 2200
MONEY: 2000 Gold Coins
|
Timberdrake will fight you at the end of the Mystic Woods. He will be flying around the screen often and will try to slam into you and the dog often. Use charged-up shots when he comes close and use strong formulas such as Fireball and Crush to finish him off. Heal when you have to and make sure the dog stays alive. This battle should be over fairly quickly. |

|
Verminator
Ebon Keep Castle
HP: 3425
EXP: 1050
MONEY: 1000 Gold Coins
|
Verminator is probably one of the hardest bosses in the game, as you or the dog won't be able to hit him with regular attacks. He will also be constantly using dark formulas, some of which will cause heavy damage. Make sure you have Heal at a high level and use it often. The dog will be useless during this battle, but keep him alive anyway. Use the Lance and throw it at Verminator to cause heavy damage, and also use a high level spell such as Fireball on him to cause more damage. Keep firing at him with the Lance and strong spells to finish him off and remember to heal often during this battle. |

|
Sterling
Gomi's Tower
HP: 3200
EXP: 3300
MONEY: 2000 Gold Coins
|
Sterling looks similar to Timberdrake, but is much harder. He will fight you at the top of the large wooden tower near Ebon Keep. He will be flying around and if he grabs you he will drop you off the tower and you'll fall down a few levels, making you have to climb back up. He will also use a strong Fireball attack, so be ready to heal often. Throw the Lance at him from a distance and let the dog attack him. Try not to use formulas as they don't cause much damage. Just remember to keep away from him and heal each time he uses Fireball. |

|
Mungola
Ivor Tower Castle
HP: 5000
EXP: 8000
Mephista
Ivor Tower Castle
HP: 500
EXP: 1000
MONEY: 250 Gold Coins
Old Nick
Ivor Tower Castle
HP: 500
EXP: 1000
MONEY: 250 Gold Coins
|
You will first have to fight Old Nick and Mephista. They will float around the screen and will occasionally use attacks on you. Use strong formulas and charged-up shots to defeat them. Once you defeat them you will have to fight them a second time before Mungola appears. Once Mungola appears, concentrate on him. He will be sitting at the rear of the room and won't use any direct attacks on you. Mephista will often heal Mungola, and they'll be revived if you destroy the two of them. Use Crush and Fireball against the face and use charged-up shots to defeat him. Let the dog attack the other two and heal when needed. |

|
Coleoptera
Bugmuck Swamp
HP: 6000
EXP: 10000
MONEY: 4000 Talons
|
Coleoptera looks similar to Thraxx and will also be found in the same place where Thraxx was, but this one will be much stronger. He will often use Acid Rain which will cause heavy damage, so be ready to heal often. His physical attacks will also be much stronger, so try to stay clear of his claws. To defeat him, use the same method as before to hit his heart. You can also use strong formulas such as Fireball to directly attack the heart. Each time you hit the heart he'll throw you down to the bottom of the room, so you'll have to walk back up again. Concentrate on the heart and heal often. Once you defeat him you'll find the Wheel needed by Tinker. |

|
Tiny
Pyramid
HP: N/A
|
Tiny will not actually fight you personally during this battle, instead he will be constantly throwing down Oglins for you to fight. This battle can be over very quickly if you know what to do. You'll notice several teleporters around, and you should find that all of them eventually link around to each other. You need to step onto the correct one to reach Tiny. To find it, go to the first teleporter and keep stepping back onto the teleporter you appear on and you'll eventually be teleported up to where Tiny is and he'll give up and hand you the Diamond Eyes. |

|
Raptor
Omnitopia Core
HP: 4000 (each)
EXP: 24 (each)
MONEY: 48 Credits (each)
|
After you destroy the speakers and fans at the upper end of the room and push all the switchs, two raptors will attack. Make sure that during these final battles, use Energize on the dog to enhance his attack power. Defeat the raptors with weapons, and two more sets of two raptors will battle you until the next enemies appear. |

|
Eye of Rimsala
Omnitopia Core
HP: 6000 (each)
EXP: 1050 (each)
|
Once you defeat the six raptors, three Eye of Rimsalas will appear. This part of the battle will be difficult. Make sure you heal when your energy gets too low and make sure the dog has Energize active all the time. Try to use charged shots on them and after a while you should begin to destroy them. |

|
Bad Boy
Omnitopia Core
HP: 999
EXP: 400
|
After the Rimsalas a clone of the boy will appear. This battle will be easy, the clone doesn't have too much HP and the dog should finish him off fairly quickly. |

|
Dark Toaster
Omnitopia Core
HP: 10000
EXP: 5000
MONEY: 20 Credits
|
Once the clone of the dog appears, make sure you have full health and the dog has Energize active. This clone will be able to hit you from a distance and will be moving around quickly. Try to use charged shots on the clone and set the dog to charge up to level 3 if not using Energize. Keep hitting it and heal often to make sure you can finish it off. |

|
Magmar
Omnitopia Core
HP: 25000
EXP: 50000
|
Magmar has a massive amount of HP, so make sure that Energize is active on the boy and the dog, as if you are on about level 40, you should cause more than 1000 HP damage each hit - even more with charged shots. Try to stay away from him as he'll use physical attacks and will often use some formulas. Heal often and make sure that the dog doesn't lose all his HP. Be careful when the electricity appears as it will begin to heal Magamr, but you can keep hitting him while he's recharging. When the screen becomes white the final boss will appear. |

|
Carltron's Robot
Omnitopia Core
HP: 30000
EXP: 100000
|
Carltron's robot will appear at the top of the room and begin to fire missiles down at you. This will be his main attack. Do not walk up behind him as large explosions will appear and cause damage. Make sure Energize is always active so that you can inflict huge damage on him. He has a heck of a lot of HP, so be ready to dodge his missiles and use the Laser Lance to throw it at him with each shot. Fire at him after he shoots, giving you time to move out of the way before he fires again. Make sure the dog stays alive and is using charged shots. Without walking up too high, you can position yourself to be level with him and can then fire at him without being hit. Be ready to heal almost all the time during this battle. You can also use the Bazooka with the Cryo-blast ammo to cause massive damage to Carltron as well. Once you destroy him sit back and watch the finale. |


